Note: This page contains instructions and screenshots so you can see what to expect when using Permits Online, our online method of applying for a TTB permit, registration, or notice.
When applying to start a new TTB-regulated business, your application package will contain both an application for original entity and a new commodity operations application (one for each permit, registration, or notice you need).
The application for original entity will establish the Permits Online entity record for your business based on your Employer Identification Number (EIN).
All of the information specific to your business entity is contained in the entity record. The entity record includes:
|
|
Note: not all questions shown in the screen prints below will appear when you fill out your application. Some questions appear based on the answers you select.
Step 1: View contact information
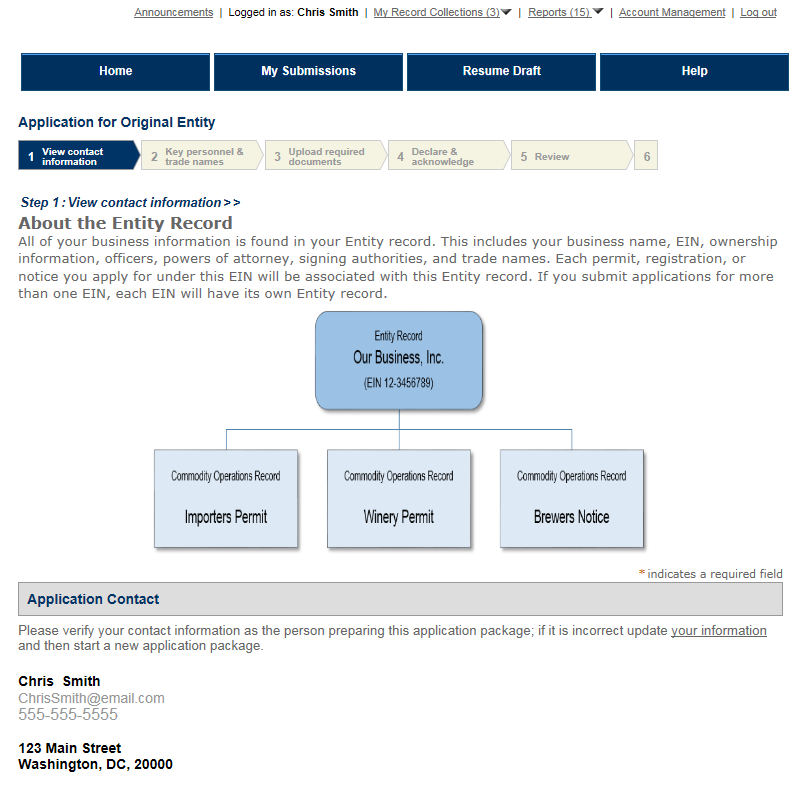
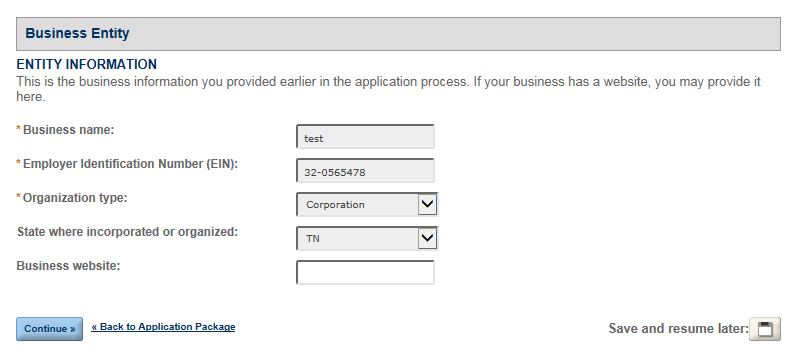
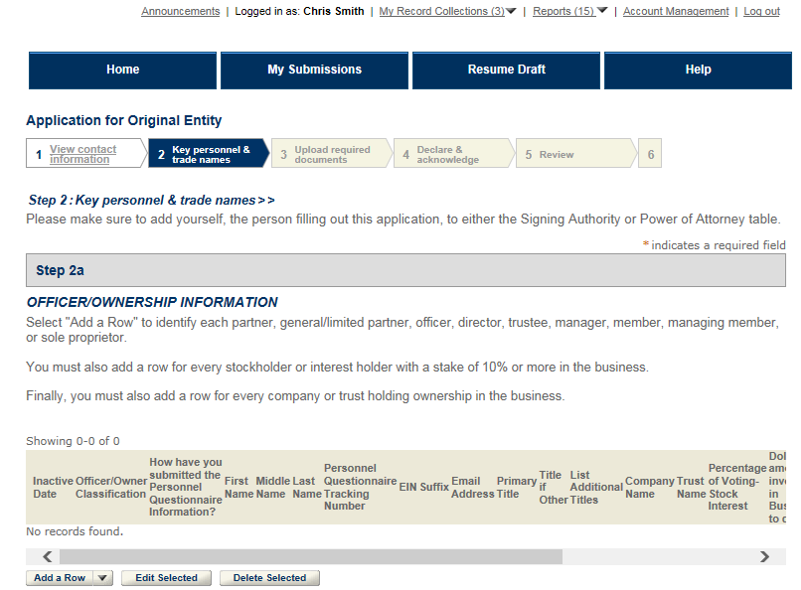
Step 2a: Key Personnel & Trade Names – Officer/Ownership Information
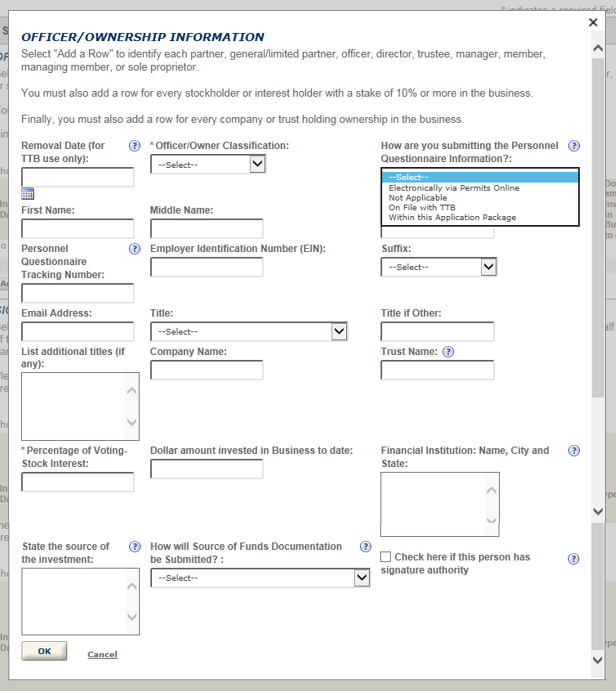
When you select "Add a row," this is the information you'll need to fill out for each person you log in the Officer/Ownership table.
To help you answer the "How are you submitting the Personnel Questionnaire (PQ) information" question, choose:
- "Electronically via Permits Online" if a PQ or OOI was filed separately via Permits Online.
- "Not Applicable" if the only TTB-regulated operations conducted by your business will be for the use of specially denatured spirits, tax free alcohol, or tax free firearms and ammunition.
- "On File with TTB" if the PQ or OOI was filed separately via paper, through the mail.
- "Within this Application Package" if you are filling out the PQ while completing the rest of the applications in your package.
You will not be required to add a PQ tracking number for applications completed within the application package; the tracking number will automatically be added upon submitting your application package.
Step 2a: Key Personnel & Trade Names – Signing Authority
Anyone authorized to act on behalf of the business, including the person submitting the application package, must also be entered into either the Signing Authority or Power of Attorney table. Evidence of each person's authority must be uploaded in Step 3.
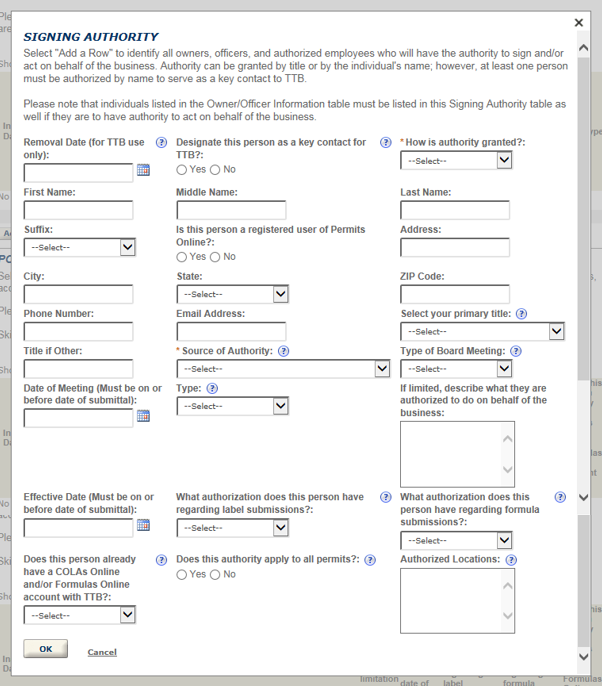
In the Signing Authority table, be sure you log at least one person from the business (preferably an owner) who has signing authority granted by name as a Key Contact.
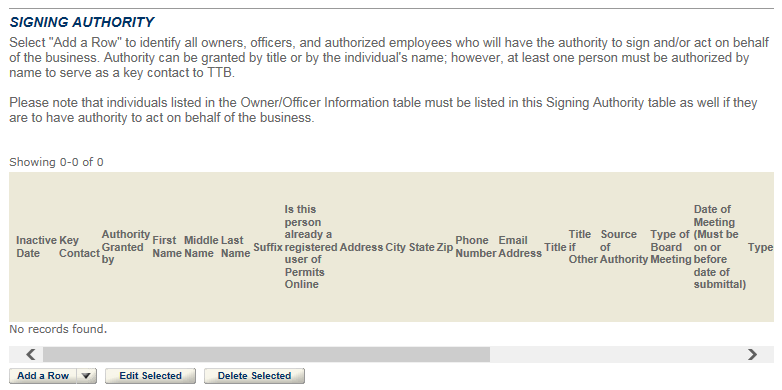
When you select "Add a row," this is the information you'll need to fill out for each person you log in the Signing Authority table.
Step 2a: Key Personnel & Trade Names – Power of Attorney
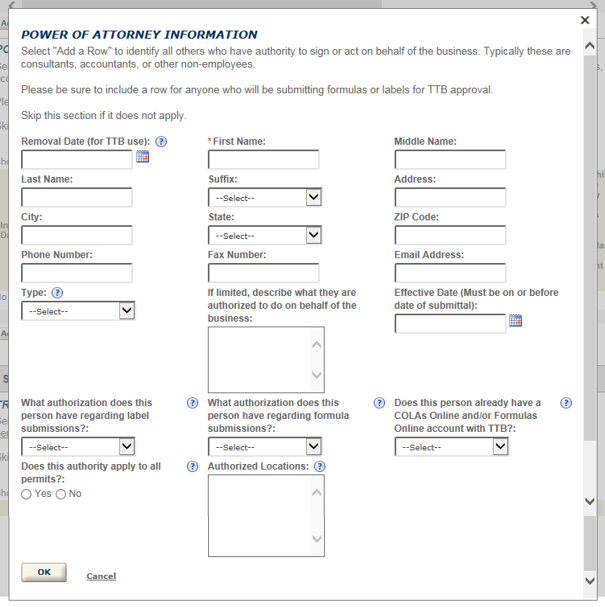
Anyone authorized to act on behalf of the business, including the person submitting the application package, must also be entered into either the Signing Authority or Power of Attorney table. Evidence of each person's Power of Attorney must be documented using TTB F 5000.8, then attached in Step 3.
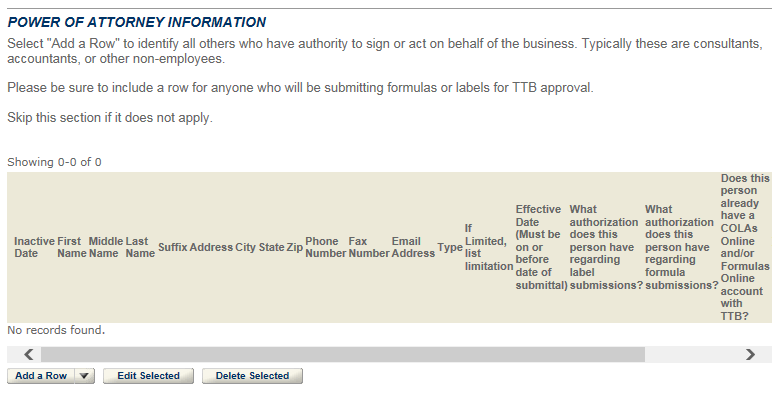
When you select "Add a row," this is the information you'll need to fill out for each person you log in the Power of Attorney table.
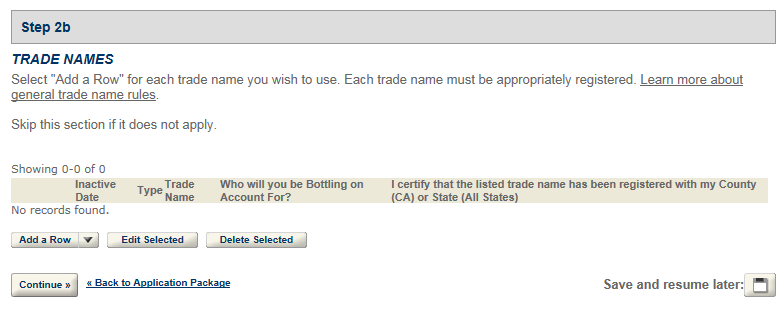
Step 2b: Key Personnel & Trade Names – Trade Names
Trade names apply to all locations under the EIN. If you are bottling on account for someone else (contract bottling), you will be required to upload an authorization letter in Step 3.
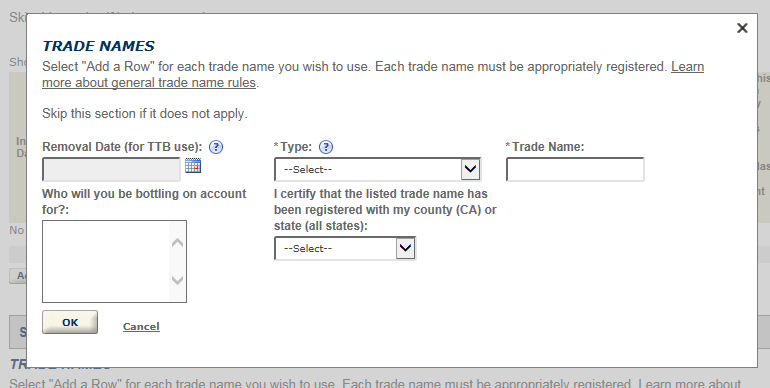
When you select "Add a row," this is the information you'll need to fill out for each trade name you log in the Trade Names table.
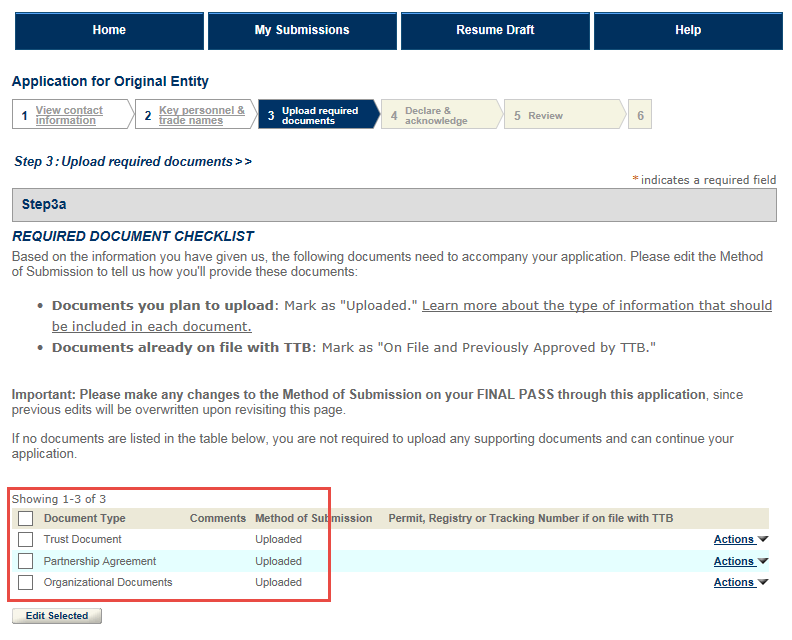
Step 3: Upload Required Documents
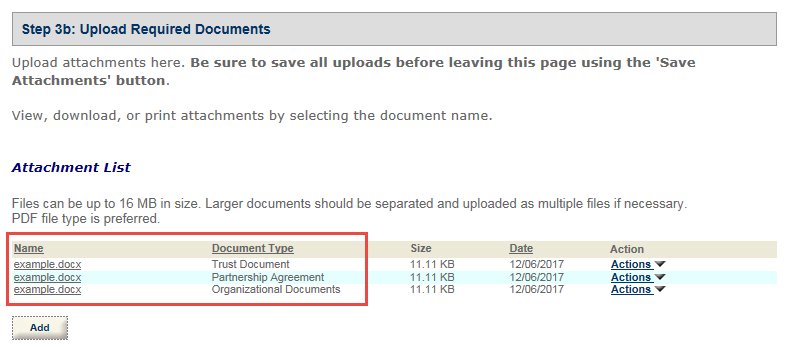
Based on the answers you provided in the application, you will be provided with a list of documents in Step 3a that you will attach in Step 3b. Learn more about how to upload documents.
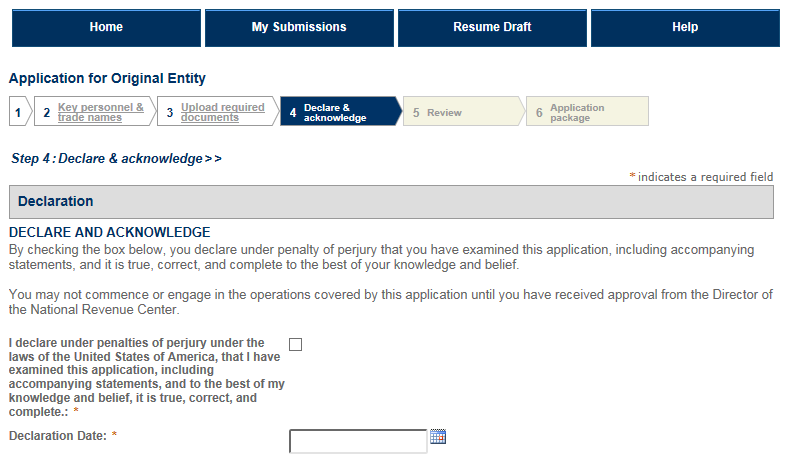
Step 4: Declare & Acknowledge
Step 5: Review
Review the answers you provided. If you would like to change your answers, select one of the previous steps to go to that screen.

Step 6: Application Package
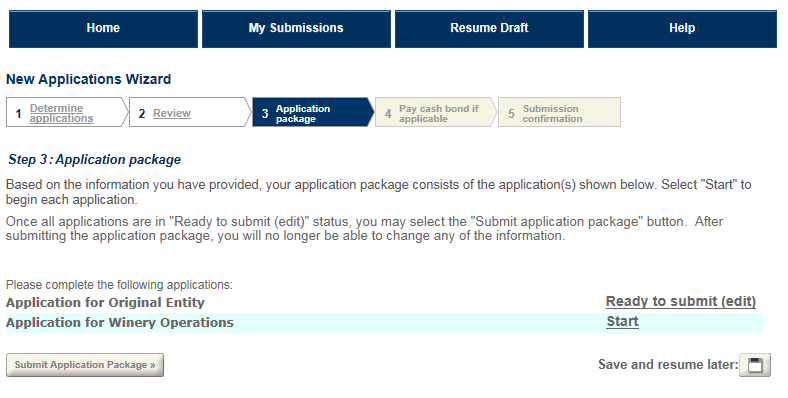
Step 6 will return you to the Application Package screen so you can complete other applications. Note that your Entity application is now in "Ready to submit (edit)" status. You can continue to make changes to all the applications within your package up until you submit.
Go back to the Permits Online Help Center

